Installing it

Installing a Floating Floor, Step by Step

A step-by-step floating installation — acclimatisation, expansion gaps, laying direction, cutting in, and finishing with scotia or trim.

The short answer

Acclimatise the boxes in the room, check the subfloor is flat to the tolerance in the product's installation documentation, then lay the planks as a floating floor with an expansion gap around every edge. Boards click together — no glue, no nails. The two things that decide the outcome are subfloor preparation and the expansion gap.

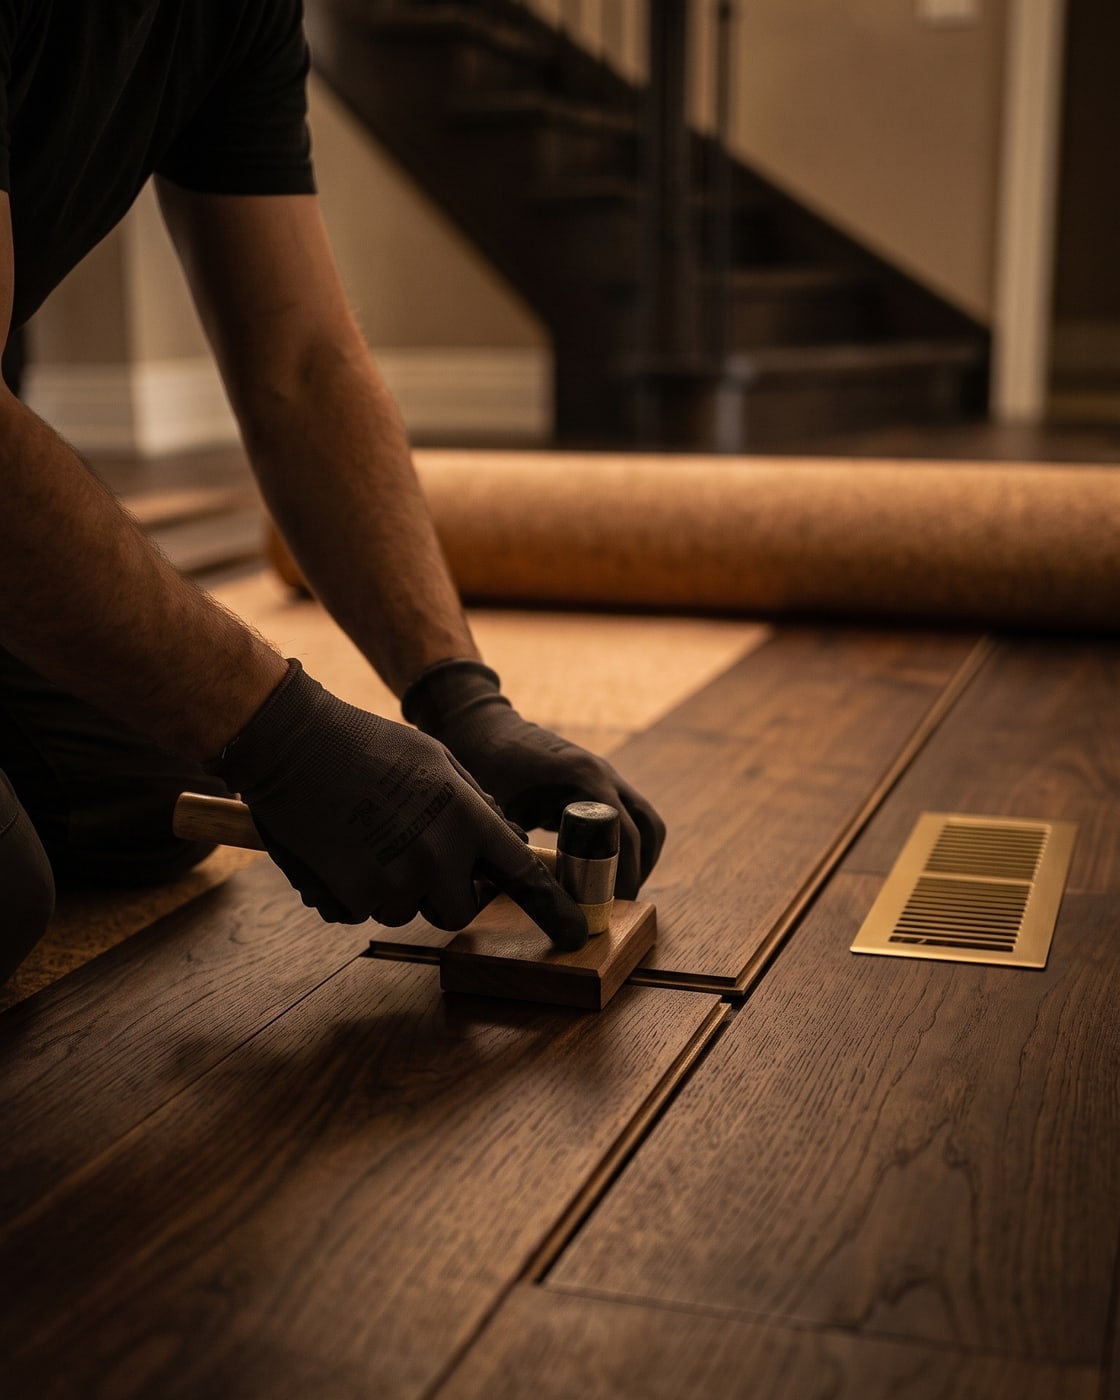
An installer tapping a plank into place with a tapping block and mallet over acoustic underlay

Last reviewed September 2026

Does installing it yourself void the warranty?

Not automatically, and this is worth stating precisely because it is the question that makes people hesitate.

A customer installing the flooring themselves does not necessarily mean a genuine manufacturing defect is excluded. If a plank delaminates or a decor layer fails, that is a product fault regardless of who laid it.

What is excluded is damage or failure resulting from incorrect installation: inadequate subfloor preparation, incorrect expansion allowances, moisture issues, or failure to follow the installation requirements. Those are not manufacturing defects, and no manufacturer covers them.

So the flooring must be installed strictly in accordance with the applicable installation instructions. Read them before you start, not when something does not fit.

Square Flooring's workmanship warranty is a separate thing again, and it applies only where the installation was arranged or performed through our installation service.
What you need

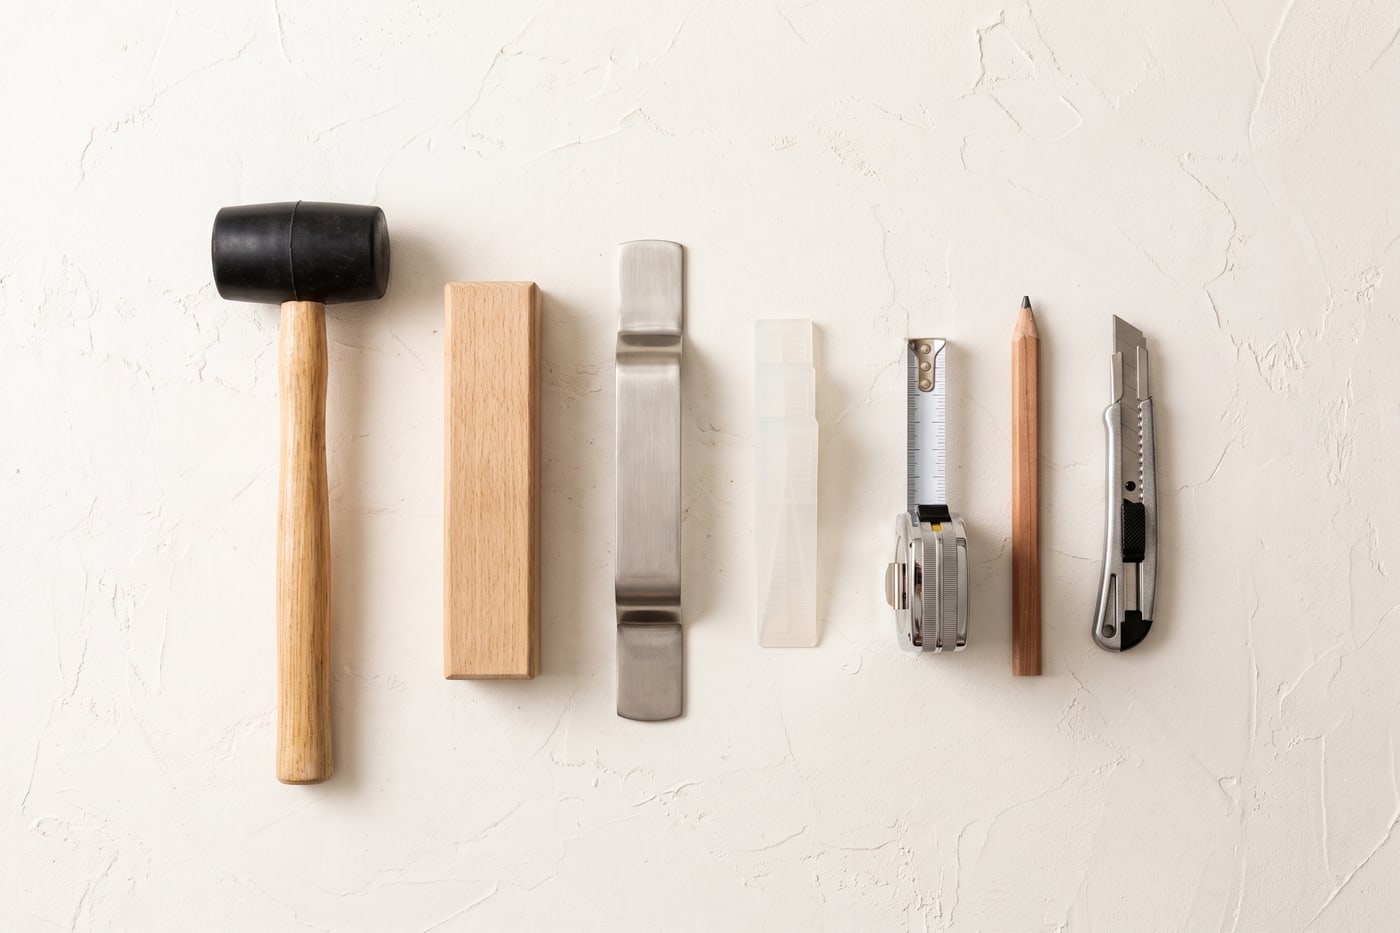
Nothing exotic, and most of it you can hire.

  1. Tape measure, pencil, and a long straightedge or spirit level for checking the subfloor.
  2. Spacers for the expansion gap — proper wedges rather than offcuts, so the gap stays consistent.
  3. A pull bar for the last row, and a tapping block. Never tap a plank edge directly with a mallet.
  4. A rubber mallet. On a 5G system such as EVSPC you will barely use it.
  5. A jigsaw or multi-tool for cutting around door frames and pipes; a sharp utility knife scores and snaps most straight cuts.
  6. Knee pads. Not optional after the first hour.
Flooring installation tools laid out in a row: rubber mallet, tapping block, pull bar, spacer wedges, tape measure and knife

Acclimatise the flooring first

Lay the unopened boxes flat in the room where the floor is going, and leave them there for the period the installation instructions specify.

The point is temperature, not moisture. A plank that goes down cold in a room that will be warm expands after installation, and if the expansion gap has already been consumed the floor has nowhere to go but up.

Stack boxes flat and spread out rather than in one tall tower against a wall — the middle of a tall stack takes far longer to reach room temperature.

Check the subfloor

Flat to the tolerance in the installation documentation for your range, checked with a straightedge in every direction, and sound with nothing moving underneath.

This is the step people skip and the step that decides whether the floor is still tight in five years. A rigid floating floor over an uneven substrate flexes with every footfall, and flexing works click joints apart.

Concrete also needs to be dry, with moisture testing where the installation specification requires it. Our subfloor guide covers grinding, levelling and moisture in detail.

Do not add underlay

Our hybrid planks arrive with IXPE acoustic underlay already bonded to the underside. There is nothing to lay.

For products that already have an attached IXPE underlay, an additional layer of underlay should not be installed unless it is specifically approved for that product and application.

The reason is mechanical rather than bureaucratic: additional cushioning affects the stability of a floating floor and the performance of its click system. A rigid board on a soft bed flexes at the joint, and the joint is the weakest part of the floor.

TITAN laminate is the exception — it needs a separate underlay, and on concrete that underlay must include a moisture barrier.

Plan the layout before you open a box

Measure the room and divide by the plank width to see how wide the last row lands. If it comes out under about 50mm, cut the first row narrower so the first and last rows are balanced — a sliver along one wall looks like a mistake and is fragile.

Run boards along the longest wall, and where possible parallel to the main light source. Lengthways with the light hides joints; across it lights every one of them.

In a hallway, run boards down the length of the hall regardless of what the adjoining rooms do. Cross-laying a corridor makes it look shorter and draws attention to every seam.

Stagger end joints by at least the distance the installation instructions specify, and avoid a repeating staircase pattern — mix planks from several boxes as you go so colour variation distributes naturally rather than arriving in patches.

Which way to run the boards

Plan view, window at the left of each room. Run boards toward the main light source and the joints recede; run them across it and every joint catches a shadow.

Two rooms in plan comparing board direction relative to the windowIn the first room the boards run away from the window, along the light, and the joints are inconspicuous. In the second they run across the light, so each joint casts a shadow line.Boards with the lightJoints recede. Also makes a room read longer.Boards across the lightEvery joint catches a shadow and shows.

The expansion gap

This is the one that ruins floors. A floating floor moves as a single sheet with temperature, and it needs a gap around every fixed edge to move into.

That means every wall, but also every doorframe, every pipe, the kitchen kick, the hearth, and anything else fixed to the structure. One forgotten pipe collar can buckle a whole room.

Use proper spacers and leave them in until the floor is finished. The gap gets covered by skirting or scotia afterwards, so it never shows.

Do not fix skirting through the floor, and do not silicone the floor to the wall. Both pin the floor and defeat the entire point of the gap.

The perimeter expansion gap

A floating floor moves as one sheet. The gap is the room it moves into, and the scotia hides it. Skirting fixes to the wall — never through the floor.

Section through the edge of a floating floor at a wallThe plank stops short of the wall, leaving an expansion gap. Scotia covers the gap and is fixed to the skirting, so the floor stays free to move underneath it.WallSkirtingScotiaPinned to the skirting, not to the floorSubfloor — nothing fixes the floor to itExpansion gap — per your installation instructionsthe floor moves

Long runs and expansion joints

Perimeter gaps handle a normal room. Long continuous runs — a hallway feeding several rooms, or an open-plan area running the depth of a house — need an intermediate expansion joint at some point, because the accumulated movement across a large sheet exceeds what a perimeter gap can absorb.

Doorways are the natural place for one, since a threshold strip covers it neatly.

Our manufacturer confirms a maximum continuous area of 12m × 12m across SILVA, AXEN and TITAN. Past that, break the floor with an expansion joint or a transition. Note that this is an area limit in both directions, not just a length — a room 14m long and 4m wide needs a break even though it is nowhere near 12m across.

Maximum continuous area before a joint by collection
CollectionMaximum continuous area before a joint
SILVA 7mm Hybrid12m × 12m
AXEN 9mm Hybrid12m × 12m
TITAN 12mm Laminate12m × 12m
Break the floor with an expansion joint or transition beyond this. Confirmed by our manufacturer, September 2026. EVSPC is supplied by an external supplier and is not covered by these figures.

The first row

Start in the left corner of the longest wall with the tongue side facing the wall, and work left to right.

Get this row dead straight. Walls are rarely square, so measure from the wall at both ends rather than assuming — if the wall bows, scribe the first row to follow it and keep the leading edge straight.

Everything downstream inherits this row's alignment. Ten minutes here saves an hour at the far wall.

Clicking the boards together

On a conventional locking system, present the long edge at an angle of roughly 20 to 30 degrees, engage the profile along its length, then lower the board flat. The short edge is then tapped home with a tapping block.

On EVSPC's patented 5G system, the short edge does the work itself: angle the long side in, drop the board, and a sprung insert engages the short joint with an audible click. No tapping block, and a tighter joint.

Never hit a plank edge directly with a mallet. Use the tapping block every time — a bruised locking profile does not seal properly and cannot be repaired.

If a joint will not close, do not force it. Lift the board and check for debris in the profile. Almost every stubborn joint is a chip of offcut in the groove.

Cutting in at doors and obstacles

Undercut door frames rather than scribing planks around them. A multi-tool or a flush-cut saw run flat on an offcut takes the bottom off the architrave at exactly the right height, and the plank slides underneath for a clean finish with the expansion gap hidden.

For pipes, drill a hole the pipe diameter plus the expansion gap, then cut a wedge out behind it, slide the plank in and glue the wedge back. A pipe collar covers the join.

Leave the expansion gap at every obstacle, not just at walls.

The last row

Measure the remaining width at several points along the wall — it will vary, because the wall is not straight.

Rip the boards to width minus the expansion gap, then use the pull bar to draw each one home. There is no room to angle a board in against a wall, which is exactly what the pull bar is for.

Resist the temptation to close the last row tight against the wall. The gap matters as much here as anywhere else.

Scotia, trims and stair nosing

Remove the spacers, then cover the perimeter gap with skirting or scotia. Fix it to the wall, never through the floor — the floor has to be able to move underneath it.

Colour-matched scotia, trims and stair nosing are available for our ranges, subject to product and stock availability. Ordering these with the flooring rather than after it avoids a batch mismatch.

Transition strips go at every doorway and at any expansion joint. Choose the profile before you lay the floor, because some need fixing down before the last boards go in.

Underfloor heating

If the floor is going over a heated subfloor, the commissioning sequence matters: the heating is generally brought up and back down gradually before installation, and there is a limit on floor surface temperature afterwards.

That limit is a floor surface temperature, not a thermostat setting, and it is the number that matters. Exceeding it is one of the few ways to damage a floating floor from underneath, and the SILVA and AXEN warranties both exclude movement, gapping and joint damage caused by excessive heat.

The hybrids tolerate more heat than the laminate. TITAN has an HDF core rather than SPC, so its limit is lower — 28°C against 36°C. If you are choosing a floor for a heated slab, that difference is worth knowing before you pick a colour.

Maximum floor surface temperature by collection
CollectionMaximum floor surface temperature
SILVA 7mm Hybrid36°C
AXEN 9mm Hybrid36°C
TITAN 12mm Laminate28°C
Measured at the floor surface, not at the thermostat. Confirmed by our manufacturer, September 2026. EVSPC is supplied by an external supplier and is not covered by these figures.

When to hand it over

Stairs. Stair nosing is unforgiving, visible from everywhere, and dangerous if it is wrong.

A subfloor that fails the straightedge test across a whole room — that is a preparation job before it is a flooring job.

Anything involving suspected asbestos in an existing floor. Have it assessed by a licensed professional first; our installers will not disturb it.

Very large open-plan areas, where expansion planning across a big connected sheet gets genuinely technical.

We install across Victoria, for flooring supplied by us, with a workmanship warranty separate from the product warranty.

Common questions

Does DIY installation void the warranty?

Not automatically. A genuine manufacturing defect is not excluded because you laid the floor yourself. What is excluded is damage from incorrect installation — inadequate subfloor prep, wrong expansion allowances, or moisture issues.

Do I need underlay under hybrid flooring?

No. IXPE acoustic underlay is bonded to the plank at the factory. Do not add another layer unless specifically approved — extra cushioning lets a rigid floating floor flex and damages the click joint.

How big should the expansion gap be?

Follow the gap specified in your product's installation instructions, and leave it at every fixed edge — walls, doorframes, pipes, kitchen kicks and hearths, not just the perimeter walls.

Which direction should I lay the boards?

Along the longest wall, and where possible parallel to the main light source so joints are less visible. In a hallway, run boards down the length regardless of the adjoining rooms.

How long should flooring acclimatise?

For the period the installation instructions specify, with boxes laid flat and spread out in the room where the floor is going rather than stacked in one tall pile.

Can hybrid flooring be glued down?

Our ranges are floating floors and are installed as such. Gluing a floating floor down prevents the movement the system depends on.

Ready to Request a Quote?

Browse the catalogue, shortlist your preferred range, and send us your project details for direct-to-market pricing.